In this tutorial we will learn how to install (LEMP) Nginx, MySQL or MariaDB and PHP with PHP-FPM on Fedora 23/24 server. Before starting just a little introduction what is “Nginx”. Nginx is an open-source, light weight high-performance HTTP server packed with lots of great features and that is very low in resource consumption.
This comprehensive guide walks you through the installation while expecting you to run the given commands on the linux machine. if you proceed as a privileged user you can simply run them but if you proceed as a non privileged one, you will proceed by using the commands with
sudo
Install Nginx
To serve web pages to our visitors, we will be installing Nginx, a modern and efficient web server. For this we will be using dnf package manager from fedora to complete the installation.
Since we are using fedora 22 + version we will be using “dnf” instead of “yum” for installation.
dnf install nginxNow make the service permanent during boot by below command
systemctl enable nginx.service
systemctl start nginx.service
If firewall is enabled, then we need to perform the below steps. we need to open the required ports on our server to accept the connections
firewall-cmd --permanent --add-service=http
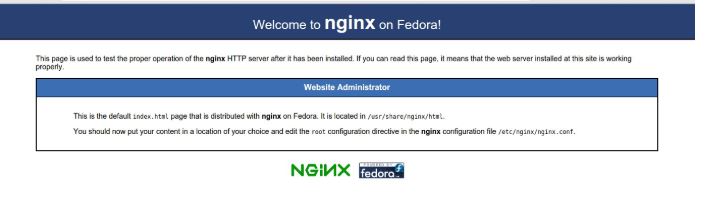
firewall-cmd --reloadNow, open web browser on a remote PC and type in the URL http://<Your server IP>. You should see a page similar to the following.
Install MySQL / MariaDB
Install MariaDB
Since MariaDB is a MySQL fork of the original MySQL developer Monty Widenius, We will go with MariaDB.
dnf install mariadb-server mariadbAfter installation we need to start and enable the DB services.
systemctl start mariadb.service
systemctl enable mariadb.service
Now we need to configure the Database to complete the installation
mysql_secure_installationWe will be asked to enter the password for the MySQL root account, since
we haven’t set this yet, so just hit ENTER . Then we will be asked to set that password. we should type Y to set a root password.
To rest of all the questions, the script asks, you should press Y, followed by the ENTER key at each prompt. During this process we will remove anonymous users and the test database, disable remote root logins, and load these new rules MySQL.
Install MySQL
NOTE :This is an optional step, since MariaDB is already installed. If you want to go with MySQL instead of MariaDB, then this for you.
We need to download and add the MySQL community repository to proceed further.
dnf install https://dev.mysql.com/get/mysql80-community-release-fc27-1.noarch.rpmNow we need to install, start and enable MySQL. During the installation, we will be asked to accept the results from the .rpm file’s GPG verification. If no error or mismatch occurs, enter y.
dnf install mysql-server
systemctl start mysqld
Further installation is similar to MariaDB..
mysql_secure_installationInstall PHP
Now to generate dynamic content, we need to install PHP. We can get a full list of available PHP modules and extensions using the following command.
dnf install php-fpm php-mysql php-commonDue to some security reasons, we need to edit the following file.
/etc/php.iniFind the line, cgi.fix_pathinfo=1, and change the 1 to 0.
- vi /etc/php.ini
-
cgi.fix_pathinfo=0
If this number is set to 0, the interpreter will only process the exact file path, which minimize the risk.
Now start and enable php-fpm
systemctl enable php-fpm.service
systemctl start php-fpm.service
Configure Nginx
We can increase number of workers for Nginx to our cpu value in /etc/nginx/nginx.conf file. we can get this number from “lscpu” command.
Here our value is 2 from the value, hence we set the value to 2.
- /etc/nginx/nginx.conf
-
worker_processes 2;
Now save and close the file, edit the “/etc/nginx/conf.d/default.conf” file with your server details as shown below
vi /etc/nginx/conf.d/default.conf- /etc/nginx/conf.d/default.conf
-
listen x.x.x.x:80;
server_name www.codesposts.com
Modify the above lines as per your details, save and close the file.
systemctl restart nginx.serviceConfigure PHP
We need to change the user from Apache to Nginx in php-fpm configuration file.
vi /etc/php-fpm.d/www.conf- /etc/php-fpm.d/www.conf
-
; Unix user/group of processes
; Note: The user is mandatory. If the group is not set, the default user's group
;	will be used.
; RPM: apache Choosed to be able to access some dir as httpd
user = nginx
; RPM: Keep a group allowed to write in log dir.
group = nginx
In the above config file, user and group are replaced with “nginx”, instead of “apache”. Now save and close the file and restart php-fpm service
systemctl restart php-fpmWe will create a test file called “codesposts.php” to check the php components.
vi /usr/share/nginx/html/codesposts.php- /var/www/codesposts.com/test.php
-
<?php phpinfo(); ?>
Save and close the file, restart the Nginx service.
systemctl restart nginx.servicewe can visit this web page in a web browser from the below shown URL.
http://<Your_serverIP>/codesposts.phpwe should see a web page that has been generated by PHP with information about your server.
With this, we have successfully completed the installation of LEMP with php-fpm on Fedora 23/24 server.
Thanks for being with us, hope this help you in gaining knowledge and we are always ready to help you. For furthers queries or suggestions, kindly drop a comment below.


