This comprehensive Linux guide expects that you run the following commands as root user but if you decide to run the commands as a different user then ensure that the user has
sudoaccess and that you precede each of the privileged commands withsudo
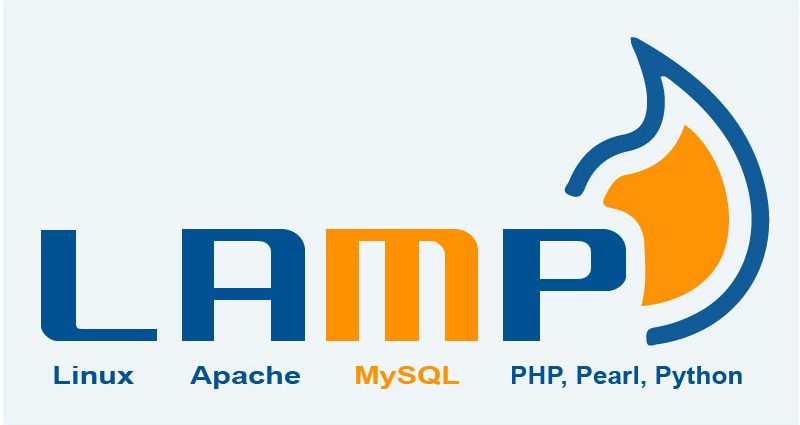
LEMP is a variation of the ubiquitous LAMP stack used for developing and deploying web applications. Traditionally, LAMP consists of Linux, Apache, MySQL, and PHP. Due to its modular nature, the components can easily be swapped out. With LEMP, Apache is replaced with the lightweight yet powerful Nginx.
This tutorial will guide how to install LEMP stack (Linux, Nginx, MariaDB database and PHP) on Debian buster 10. You can follow the steps below.
Steps To Install LEMP Stack
To install the LEMP stack, you first need to have Debian 10 Buster running on your system with a non-root sudo-enabled user account and a basic firewall.
Updating Debian 10 Buster
The first step to install the LEMP stack on your system is to update your Debian 10 Buster and it’s repositories to the latest version. You can run the following command
root@codesposts:~$ apt update && apt -y upgradeInstalling Nginx Web Server
You can run the following commands to install the Nginx web server on your Debian 10.
root@codesposts:~$ apt install nginxAllowing Connections
If you have the ufw firewall running, you will need to allow connections to Nginx. You can run the following command to allow connections to Nginx
root@codesposts:~$ ufw allow 'Nginx HTTP'Configuring Nginx
Nginx site configurations are stored in /etc/nginx/sites-available and linked to /etc/nginx/sites-enabled. Create a new file for your server’s configuration in /etc/nginx/sites-available, and open it in your text editor.
Copy the following code to the file and save it.
- /etc/nginx/sites-available/codesposts
-
server {
    listen 80 default_server;
    listen [::]:80 default_server;

    root /ver/www/html;
    index index.php index.html;

    server_name yourwebsite.com;

    location / {
        try_files $uri $uri/ =404;
    }

    location ~ \.php$ {
        include snippets/fastcgi-php.conf;
        fastcgi_pass unix:/var/run/php/php7.3-fpm.sock;
    }

}
Now, link the newly created file to sites-enabledby running the following command.
root@codespsots:~$ ln -s /etc/nginx/sites-available/codesposts /etc/nginx/sites-enabled/codespostsReplace “codesposts”with your site name.
After this, restart the services by the following command
root@codesposts:~$ systemctl restart nginxInstalling MariaDB Database Server
Run the following commands to install the MariaDB Database Server ( drop-in replacement for MySQL-Server)
root@codesposts:~$ apt install -y mariadb-server
root@codesposts:~$ apt install -y mariadb-client
Verifying Installed Version
To verify the installed version, run the following command
root@codesposts:~$ apt policy mariadb-server

mariadb-server:
  Installed: 10.1.38-0+deb9u1
  Candidate: 10.1.38-0+deb9u1
  Version table:
 *** 10.1.38-0+deb9u1 500
        500 http://http.us.debian.org/debian stretch/main amd64 Packages
        100 /var/lib/dpkg/status
     10.1.37-0+deb9u1 500
        500 http://security.debian.org/debian-security stretch/updates/main amd64 Packages
Verifying Services
To check the status of the services of the MariaDB, run the following command
root@codesposts:~$ systemctl status mariadb

● mariadb.service - MariaDB 10.1.38 database server
   Loaded: loaded (/lib/systemd/system/mariadb.service; enabled; vendor preset: enabled)
   Active: active (running) since Tue 2019-08-06 12:16:38 UTC; 3min 53s ago
     Docs: man:mysqld(8)
           https://mariadb.com/kb/en/library/systemd/
 Main PID: 17063 (mysqld)
   Status: "Taking your SQL requests now..."
   CGroup: /system.slice/mariadb.service
           └─17063 /usr/sbin/mysqld

Aug 06 12:16:37 codesposts systemd[1]: Starting MariaDB 10.1.38 database server...
Aug 06 12:16:38 codesposts mysqld[17063]: 2019-08-06 12:16:38 140387851017600 [Note] /usr/sbin/mysqld (mysqld 10.1.38-MariaDB-0+deb9u1) starting as process 17063 ...
Aug 06 12:16:38 codesposts systemd[1]: Started MariaDB 10.1.38 database server.
Securing Database Server
Run the command below to secure your database server
root@codesposts:~$ mysql_secure_installation

 NOTE: RUNNING ALL PARTS OF THIS SCRIPT IS RECOMMENDED FOR ALL MariaDB
       SERVERS IN PRODUCTION USE!  PLEASE READ EACH STEP CAREFULLY!
 In order to log into MariaDB to secure it, we'll need the current
 password for the root user.  If you've just installed MariaDB, and
 you haven't set the root password yet, the password will be blank,
 so you should just press enter here.
 Enter current password for root (enter for none):
 OK, successfully used password, moving on…
 Setting the root password ensures that nobody can log into the MariaDB
 root user without the proper authorisation.
 Set root password? [Y/n] Y
 New password:
 Re-enter new password:
 Password updated successfully!
 Reloading privilege tables..
  … Success!
 By default, a MariaDB installation has an anonymous user, allowing anyone
 to log into MariaDB without having to have a user account created for
 them.  This is intended only for testing, and to make the installation
 go a bit smoother.  You should remove them before moving into a
 production environment.
 Remove anonymous users? [Y/n] Y
  … Success!
 Normally, root should only be allowed to connect from 'localhost'.  This
 ensures that someone cannot guess at the root password from the network.
 Disallow root login remotely? [Y/n] Y
  … Success!
 By default, MariaDB comes with a database named 'test' that anyone can
 access.  This is also intended only for testing, and should be removed
 before moving into a production environment.
 Remove test database and access to it? [Y/n] Y
 Dropping test database…
 … Success!
 Removing privileges on test database…
 … Success!
 Reloading the privilege tables will ensure that all changes made so far
 will take effect immediately.
 Reload privilege tables now? [Y/n] Y
  … Success!
 Cleaning up…
 All done!  If you've completed all of the above steps, your MariaDB
 installation should now be secure.
 Thanks for using MariaDB!
Testing MariaDB Installation
To test the installation of the MariaDB Database Server, run the following command
root@codesposts:~$ mysql -u root -p

Enter password:
Welcome to the MariaDB monitor.  Commands end with ; or \g.
Your MariaDB connection id is 6
Server version: 10.1.38-MariaDB-0+deb9u1 Debian 9.8

Copyright (c) 2000, 2018, Oracle, MariaDB Corporation Ab and others.

Type 'help;' or '\h' for help. Type '\c' to clear the current input statement.
Enabling Startup With Boot
If you want to enable the MariaDB services to start with the boot, you can run the following command
root@codesposts:~$ systemctl enable mariadbInstalling PHP
To install the latest version of PHP on your system, you can follow the steps given below
root@codesposts:~$ apt install php libapache2-mod-php php-cli php-fpm php-json php-pdo php-mysql php-zip php-gd php-mbstring php-curl php-xml php-pear php-bcmathVerifying The Version
To verify the version of the PHP installed, you can run the following command
root@codesposts:~$ php -v

PHP 7.3.4-2 (cli) (built: Apr 13 2019 19:05:48) ( NTS )
Copyright (c) 1997-2018 The PHP Group
Zend Engine v3.3.4, Copyright (c) 1998-2018 Zend Technologies
    with Zend OPcache v7.3.4-2, Copyright (c) 1999-2018, by Zend Technologies
Testing PHP Scripts
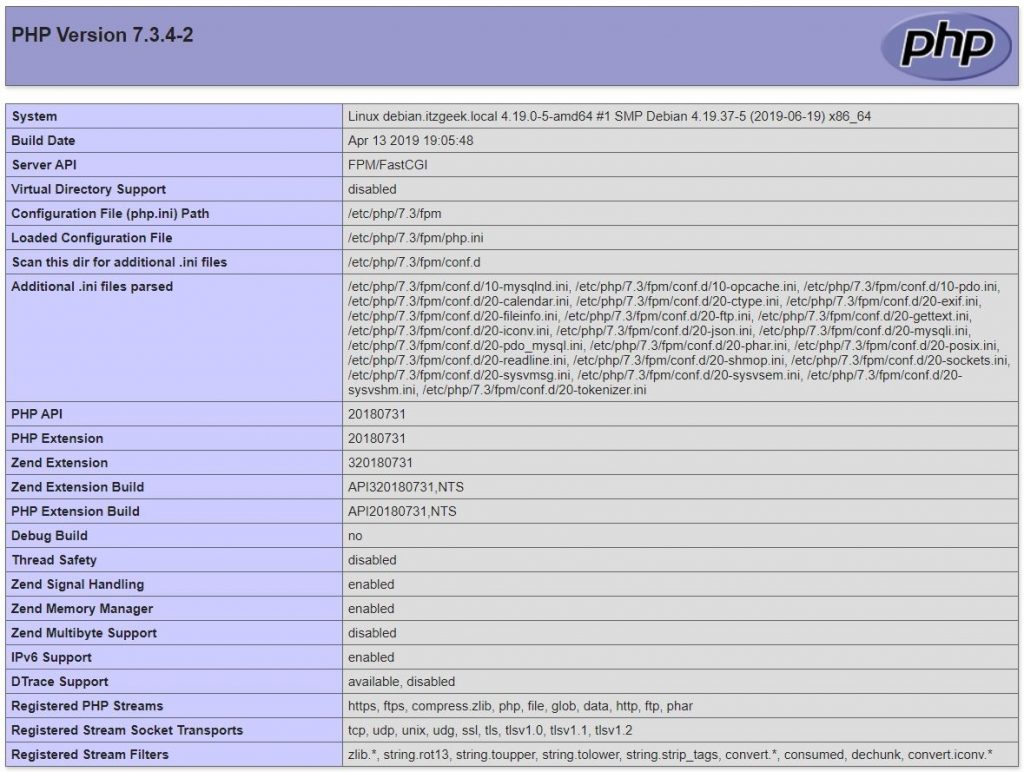
To test the php scripts with Apache server, we need to create a codesposts.php file in the Web root directory with a command line text editor.
root@codesposts:~$ nano /var/www/html/codesposts.phpCopy and paste the following code in the file
<?php phpinfo(); ?>To save a file in Nano text editor, press Ctrl+O, then press Enter to confirm. To exit, press Ctrl+X.
Now open your browser and enter server-ip-address/codesposts.php. Replace sever-ip-address with your actual IP. If you follow this tutorial on your local computer, then type 127.0.0.1/codesposts.php
You should see a page like this:
You have successfully installed LEMP stack on your system.