In this tutorial we will be setting up a LAMP stack , which includes Apache, MySQL 8 or MariDB 10, PHP 7 on Ubuntu 18.04 LTS Bionic Beaver . LAMP (Linux OS, Apache web engine with MySQL for DB and php for dynamic processing).
This comprehensive Linux guide expects that you run the following commands as root user but if you decide to run the commands as a different user then ensure that the user has
sudoaccess and that you precede each of the privileged commands withsudo
Install Nginx
To serve web pages to our visitors, we will be installing Nginx, a modern and efficient web server. For this we will be using Ubuntu’s apt package management suite to complete the installation.
apt update
apt -y install nginx
Since we are using Ubuntu 18.04 LTS, Nginx is configured to start running after installation automatically.
If the ufw firewall is running, we will need to allow the port 80 to take traffic. We can enable this port by following command.
sudo ufw allow 'Nginx HTTP'Type in your server’s IP address or hostname or http://localhost and you will see the following default output.
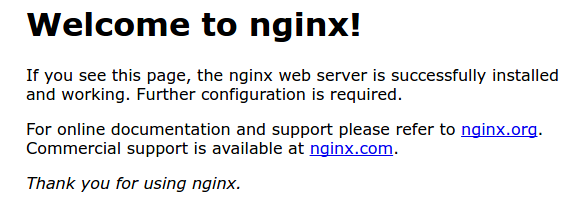
If we get an output anything similar to the above, then we have installed the Nginx successfully.
Install MySQL or MariaDB
There is an option in between installing MySQL or MariaDB, which can be seen as a drop in replacement for MySQL. In MariaDB there all the enterprise features present but without all the corporate structuring.It is managed by the MariaDB Foundation as opposed to being managed by Oracle which manages MySQL. That said, they are both good choices.
Don’t install both, only one needs to be installed.
Install MySQL
Since we are installing a web server, we need to have a database to manage data for our site. For this we are installing MySQL database.
Please follow the below steps to install MySQL DB.
apt install mysql-server
Now we need to configure the Database to complete the installation
mysql_secure_installationWe will be asked to enter the password for the MySQL root account, since
we haven’t set this yet, so just hit ENTER . Then we will be asked to set that password. we should type Y to set a root password.
To rest of all the questions, the script asks, you should press Y, followed by the ENTER key at each prompt. During this process we will remove anonymous users and the test database, disable remote root logins, and load these new rules MySQL.
Install MariaDB
NOTE :This is an optional step, since MySQL is already installed. If you want to go with MariaDB instead of MySQL, then this for you.
Since MariaDB is also an option, as mentioned earlier, and this means it can be installed just like MySql without any further steps. We will be installing MariaDB.
Please add the repository as shown below to install MariaDB for Ubuntu 18.08 LTS server.
apt install software-properties-common
apt-key adv --recv-keys --keyserver hkp://keyserver.ubuntu.com:80 0xF1656F24C74CD1D8
Now we need to configure a new apt configuration file as shown below, to download packages.
vi /etc/apt/sources.list.d/mariadb.list- /etc/apt/sources.list.d/mariadb.list
-
# MariaDB 10.3 Repository
deb [arch=amd64,arm64,ppc64el] http://sfo1.mirrors.digitalocean.com/mariadb/repo/10.3/ubuntu bionic main
deb-src http://sfo1.mirrors.digitalocean.com/mariadb/repo/10.3/ubuntu bionic main
apt update
apt install mariadb-server
Similar to MySQL server, a server needs to be setup as well.
mysql_secure_installationInstall PHP
Now to generate dynamic content, we need to install PHP. Nginx does not contain native PHP processing like other web servers, so we need to install fpm ( “fastCGI process manager” ). fpm will take all the PHP requests from Nginx web server.
Install the php-fpm and php-mysql packages as shown below.
apt install php php-fpm php-common php-mysqlThe service will be started automatically, and we can check this using the below command
systemctl status php7.2-fpmConfigure Nginx To Use PHP
Now we need to make Nginx to communicate with PHP for dynamic content.
First open /etc/php/7.2/fpm/php.ini file and make cgi.fix_pathinfo to zero, as shown below
vi /etc/php/7.2/fpm/php.ini- /etc/php/7.2/fpm/php.ini
-
; cgi.fix_pathinfo provides *real* PATH_INFO/PATH_TRANSLATED support for CGI.  PHP's
; previous behaviour was to set PATH_TRANSLATED to SCRIPT_FILENAME, and to not grok
; what PATH_INFO is.  For more information on PATH_INFO, see the cgi specs.  Setting
; this to 1 will cause PHP CGI to fix its paths to conform to the spec.  A setting
; of zero causes PHP to behave as before.  Default is 1.  You should fix your scripts
; to use SCRIPT_FILENAME rather than PATH_TRANSLATED.
; http://php.net/cgi.fix-pathinfo
cgi.fix_pathinfo=0
For this configuration, we will avoid the default directories of Nginx by creating new configuration file and new root directory to hold our PHP files.We name the new files with our domain or host names as required.
Then create a new configuration file in Nginx’s sites-available directory:
/etc/nginx/sites-available/codesposts.com.confThis will open a blank file, here we will paste the basic structure for our configuration as shown below.
- /etc/nginx/sites-available/codesposts.com.conf
-
server {
    listen 80;
    listen [::]:80;

    root /var/www/codesposts.com;
    index index.php index.html index.htm;

    server_name codesposts.com;

    location / {
        try_files $uri $uri/ =404;
    }

    location ~ \.php$ {
        include snippets/fastcgi-php.conf;
        fastcgi_pass unix:/var/run/php/php7.0-fpm.sock;
    }
}
This simple configuration listens on port 80 and serves files from the web root we just created. Nginx will respond to requests for the name provided after server_name, and any files ending in .php will be processed by the php-fpm process before Nginx sends the results to the user.
Now save and close the file after this basic configuration.
Now we will link our new config file to Nginx’s sites-enabled directory:
ln -s /etc/nginx/sites-available/codesposts.com.conf /etc/nginx/sites-enabled/This above step informs Nginx to use the configuration next time it is reloaded. Now we will test our configuration for any syntax errors by the below command.
nginx -tIf no errors were reported, then reload Nginx to make the changes:
systemctl reload nginxTest PHP Configuration
Now we need test our LEMP stack, to validate that Nginx can correctly hand .php files by our PHP processor.
To do this we need to create a test PHP file in our document root. We will create a codesposts.php file in the document root.
/var/www/html/codesposts.phpNow paste the below code in the blank file we have opened. Which will show the info of our server.
- /var/www/codesposts.com/test.php
-
<?php phpinfo(); ?>
After pasting the above code to our codesposts.php file, save and close the file.
Now we can visit this web page in a web browser from the below shown URL.
http://<Your_serverIP>/codesposts.phpwe should see a web page that has been generated by PHP with information about your server. If we get this page, then we can assume that we have successfully configured our LEMP stack.
Now for security reasons, we can delete this test.php file, so that no others can get the info about our servers.
Thanks for being with us, hope this help you gain knowledge and we are always ready to help you. For furthers queries or suggestions, kindly drop a comment below.